A mineral sizer can often show early signs of trouble long before a major failure occurs. For mine operators, the challenge is not simply knowing what to inspect, but knowing what to check first. A fast inspection should focus on the components that directly affect crushing performance, product size, drive safety, and downtime risk.
This field-oriented checklist is designed for Mineral Sizer and Mineral Sizer Crusher inspections during shift checks, maintenance rounds, commissioning, and pre-start inspections.
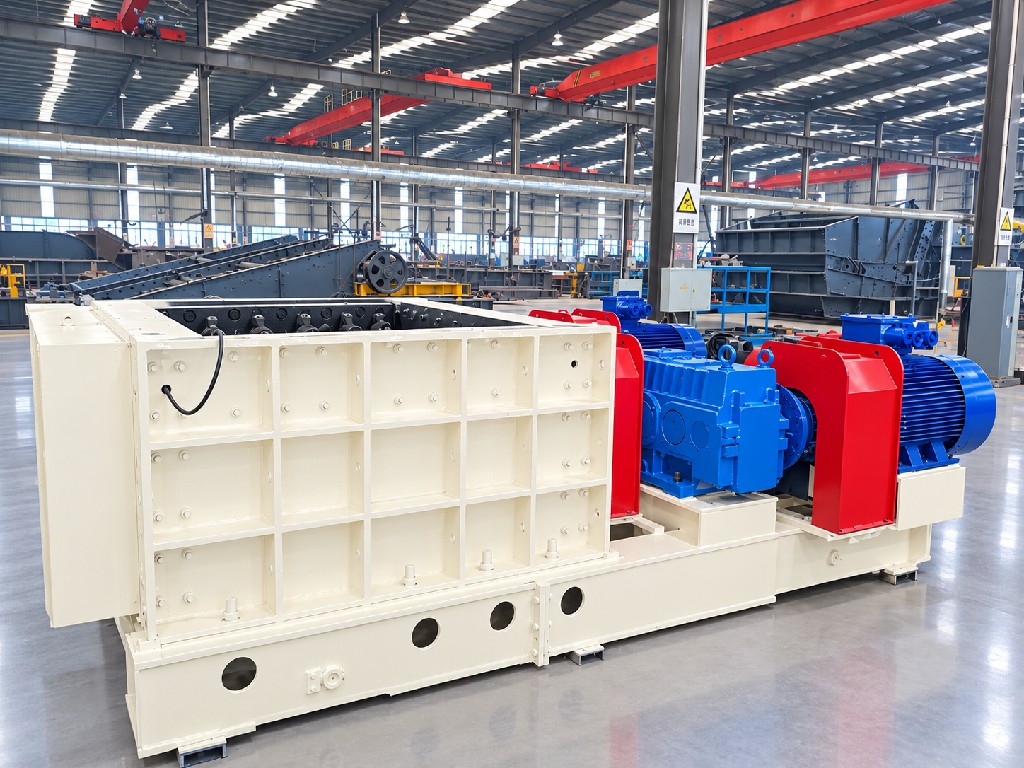
1. Start with Safety and Operating History
Before touching the machine, isolate the equipment according to the site’s lockout/tagout procedure. Never inspect exposed teeth, shafts, couplings, or moving parts while the Mineral Sizer is running.
Next, check the operating history. Ask three quick questions:
- Has throughput changed?
- Has motor current or gearbox temperature increased?
- Has the product size become less consistent?
These symptoms can narrow the inspection area immediately. A sudden change in capacity may point to feed conditions, tooth wear, drive problems, or an internal clearance issue.
2. Inspect the Feed Area First
Look at the feed chute, hopper, and material flow path. The feed should enter the sizer evenly across the crushing chamber. Large rocks arriving heavily on one side can create uneven loading and accelerate wear.
Check for bridging, blockage, excessive fines, tramp material, and wet or sticky feed. Mineral Sizer systems are commonly selected for materials such as coal and soft to medium-hard minerals, but actual performance still depends on feed size, moisture, abrasiveness, and bulk density.
Do not blame the crusher immediately when capacity falls. Poor feed distribution can make a properly designed Mineral Sizer appear to be underperforming.
3. Check Sizer Teeth and Crushing Components
The teeth are among the fastest areas to inspect and one of the most important. Compare their shape and condition across the crushing rolls.
Look for:
- Rounded or shortened tooth profiles
- Uneven wear from side to side
- Cracked, broken, or missing teeth
- Material packed around the crushing elements
- Unusual gaps between opposing rolls
Moderate wear is expected. The key issue is whether the wear pattern remains within the equipment’s operating requirements. Uneven tooth wear can indicate abnormal feed distribution, misalignment, unsuitable tooth configuration, or different material loading.
A common mistake is to judge tooth condition only by visual appearance. Measure wear against the manufacturer’s recommended replacement or service limits whenever available.
4. Inspect Shafts, Bearings, and Roll Alignment
The crushing rolls must maintain stable alignment under load. During a stopped-machine inspection, look for signs of movement, abnormal clearances, oil leakage around bearing housings, damaged seals, or evidence of overheating.
Listen during a controlled test run for knocking, rumbling, or cyclic vibration. A change in sound can be an early indication of bearing, coupling, alignment, or drive problems.
Check whether the two rolls maintain the required relative position. Incorrect alignment can affect product size and may increase mechanical stress across the drive system.
5. Check the Gearbox and Drive System
A Mineral Sizer Crusher transfers significant torque through its drive arrangement, so gearbox and motor checks deserve priority.
Inspect for:
- Abnormal gearbox noise
- Oil leaks or low lubricant level
- Excessive housing temperature
- Loose mounting bolts
- Coupling damage or misalignment
- Unusual motor noise or current fluctuations
Do not rely on temperature alone. Compare current conditions with the machine’s normal operating baseline. A gearbox that is consistently hotter, noisier, or more unstable than before deserves investigation even if it has not yet failed.
6. Verify Overload and Protection Functions
Mineral Sizer systems may use mechanical, hydraulic, electrical, or combined protection arrangements depending on the design. These systems are intended to reduce damage when uncrushable material or abnormal loads enter the crusher.
Confirm that protection devices are installed, accessible, and maintained according to the equipment design. Do not bypass a protection function just to keep production running.
If the machine has recently tripped under normal feed conditions, investigate the cause rather than repeatedly resetting it. Frequent trips can indicate tramp material, excessive feed size, roll problems, drive loading, or an incorrect operating condition.
7. Inspect the Discharge and Product Size
A fast inspection should finish where the material leaves the machine. Check the discharge area for blockages and accumulated fines.
Then compare the actual product with the required size range. A Mineral Sizer is selected partly because its sizing action can provide controlled product dimensions, but the final result depends on roll configuration, tooth profile, roll speed, clearance, feed characteristics, and machine condition.
If oversize suddenly increases, inspect the teeth, roll condition, alignment, and feed characteristics before changing operating settings.
8. Run a Five-Minute Functional Check
When safe operating conditions are established, observe the Mineral Sizer during startup and normal operation.
Watch for:
- Unstable startup behavior
- Excessive vibration
- Abnormal noise
- Motor current changes
- Irregular material flow
- Oil leakage
- Product-size fluctuations
The fastest inspections compare “today” with the equipment’s normal baseline. Engineers can often identify a developing problem by detecting a trend rather than waiting for a visible failure.
9. Record What You Find
A useful inspection record should include tooth condition, bearing and gearbox observations, motor data, vibration or noise changes, feed characteristics, product size, and any protective-device trips.
Photos are also valuable. Take repeatable pictures from the same positions so wear progression can be compared over time.
Fast inspection does not mean superficial inspection. It means checking the highest-risk areas first, using operating history to narrow the search, and recording measurable changes.
A Mineral Sizer that receives consistent inspections is easier to maintain, easier to plan for wear-part replacement, and less likely to suffer avoidable production interruptions. Whether the machine handles coal, limestone, or other bulk minerals, the goal is the same: identify small changes before they become expensive failures.
FAQ
Inspect the feed area, crushing teeth, guards, bearings, gearbox, drive system, lubrication points, and discharge path. Confirm there are no loose components, blockages, leaks, or visible damage before starting the machine.
Check for broken, missing, rounded, shortened, or unevenly worn teeth. Compare wear across both rolls and use the manufacturer’s service limits when deciding whether replacement is required.
Common causes include worn crushing teeth, incorrect roll clearance, uneven feed, abnormal roll alignment, changes in feed size, or unsuitable operating conditions. Inspect mechanical condition before making process adjustments.
The inspection frequency should follow the equipment manufacturer’s maintenance recommendations and the mine’s operating conditions. Daily visual checks, routine operating observations, and scheduled detailed inspections provide different levels of protection.